Sunday, June 29, 2014

Wish Big {Paper Smooches SPARKS}

Hello!

It's time for another Paper Smooches SPARKS challenge!!  We have an extra Sunday in June, so we are celebrating with a bonus Anything Goes Challenge!    I am continuing my mission to give attention to stamp sets that have not seen much inky love, and here's my card: 


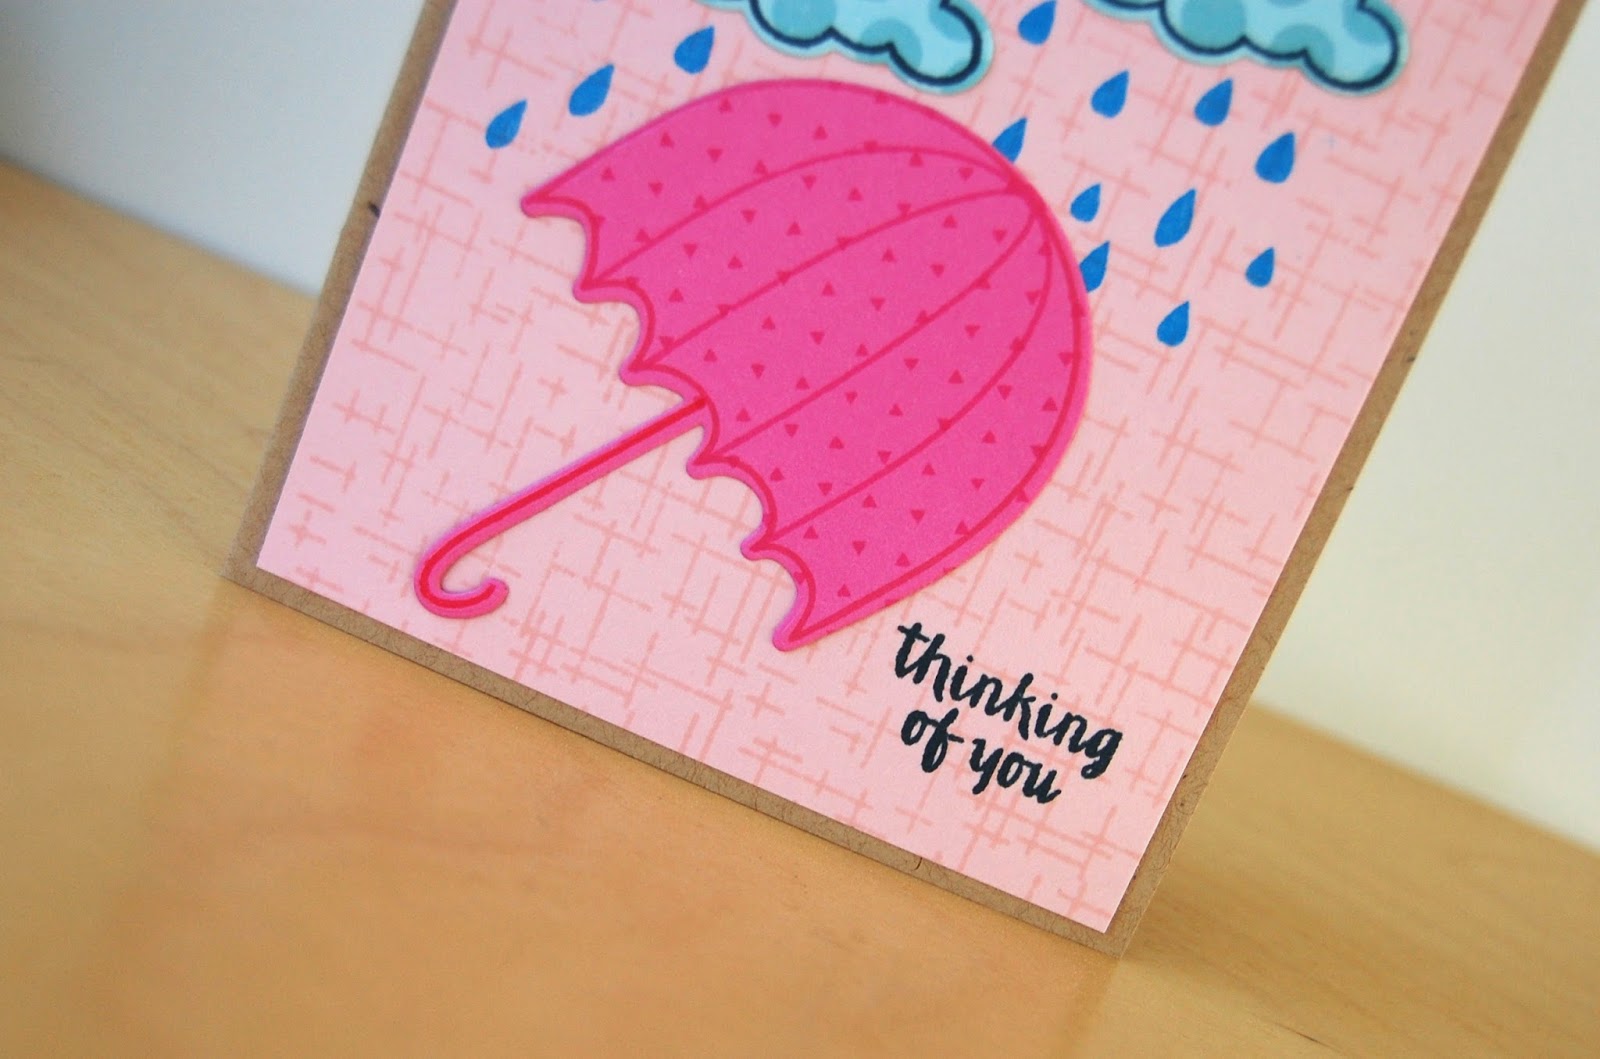
My kids have been making the rounds on the birthday party circuit, so I decided to be a little proactive and get a few cards created ahead of time.  I stamped an die cut the Elephant from Enjoy the Show and his base and adhered it to a panel of light gray cardstock.  Next I stamped a cascade of stars from the Seeing Stars set coming out of the elephant's trunk.  The sentiment is from the Birthday Sampler set.  Links to the Paper Smooches products I used are below: 


So now it's your turn! You have until 11:59 PT on Saturday, July 4 to link up your take on this week's challenge to the Paper Smooches SPARKS blog for a chance to win a $30.00 gift certificate to the Paper Smooches store. Woot woot!  

Be sure to check out the amazing inspiration from the other members of the SPARKS design team playing along with this week's challenge: 


That's all for me today!  Thanks for stopping by!
Katie

Saturday, June 28, 2014

Waffle Flower Winner

Hey all,

I hope your Saturday is going well.  Sorry I am a bit tardy with this post, Easter Seals is stopping by our house today to pick up several boxes of charitable donations, and I got caught up in deep cleaning our bathrooms.  Fun Saturday stuff.

Anyway, random.org told me that the lucky winner of the Flower Circles stamp set is commenter 10, Terri Burson!  Congrats Terri!  I will be sending you an email, but feel free to reach out to me as well at scrappy_diva (at) yahoo (dot) com.

Whatever you are up to this weekend, I hope you have fun and maybe fit in a bit of creative time!

Katie

Friday, June 27, 2014

You've Got This! {AE Challenge}

Hello and Happy Friday!

Today starts another AEI{heart}U challenge and this week's theme is GOLD.  Mmmmmm gold. I LOVE me some gold!  I used the Brushed stamp set and came up with this:


On a cream card stock base, I stamped the long brush stroke repeatedly to create bold black stripes. Next, I heat embossed the "You Got This" sentiment on black card stock with gold embossing powder and die cut the card stock into a circle. 


I attached the circle to the card with a bit of foam tape and added a few gold sequins for a little more gold.  Never enough of a good thing, right? 


Well that's it for me today. Be sure to stop by the AEI{heart}U blog for even more inspiration from the design team and to link up your take on this week's challenge.  I can't wait to see what you create!  

Thanks for stopping by!
Katie

Thursday, June 26, 2014

Take 2 Thursday- Studio Calico Hello Hello

Hello, hello friends and Happy Thursday!

Lindsay and I are back for another Take 2 Thursday and this week, we are playing with the June Card Kit from Studio Calico called Hello Hello.


After my beloved Archivers closed earlier this year, I picked up a subscription to two kit clubs to have a way to infuse some newer crafty items into my supply stash each month.  It's been fun getting a box of inspiring goodies with a selection of patterned papers and embellishments. Any items that I don't see myself using, I plan to sell or give away to keep my supplies at a manageable level.

Of course, my favorite part of any kit is the stamps, so playing with the Hello Hello stamp set, I created two cards. First up, a floral thank you card.  I used some of the shapes in the stamp set to create some flowers and leaves.


I stamped the flower centers in black and added a black enamel dot to the center.  I stamped the sentiment in black ink and adhered the panel to a kraft card base. 


Next up is a more graphic card using the polka dot stamp.  I stamped the dots across the card front in rainbow shades of ink.  I alternated the direction of the stamp and it created the fun zig-zag pattern. 


I matted the stamped panel with black cardstock  and adhered it to a green card base.  


I stamped the sentiment on a strip of paper and adhered it to the card with foam tape. 

Here is a look at the June kit- I think there some still available at the Studio Calico store. ;o)


Well that's all for me today.  Be sure to stop by Lindsay's blog to see her fantastic work with this kit.  

Thanks for stopping by!
Katie


Tuesday, June 24, 2014

Flower Circles 3 Ways {Waffle Flower Crafts} and a GIVEAWAY

Hello friends!

I do hope that your week is off to a good start.  Over the weekend, I had a chance to sit down and play with the Flower Circle Stamp set from Waffle Flower Crafts and came up with three cards that use this set in (what I think to be) a unique way.

First up, I adore the graphic shapes that Nina included in the set, so I tried my hand at a very mod floral card.


I stamped the circles, flowers, berries, stems and leaves in primary shades of red, blue, yellow and green on a simple white card base.  Using the stem and the leaves images, I was able to create a new species of climbing red vine.


I balanced all the color and interested at the bottom of the card with the sentiment stamped in black ink. 

For the next card, I wanted to try one of the suggestions that Nina included on the tip visual with this set... create a wreath.  I curved the stem and leave image on my stamping block and stamped it four times to create a circle. 


I filled in the circle with the stamped leaves, circles and berries before stamping the sentiment in black at the bottom of the panel.  I adhered the stamped panel to a card base made from turquoise cardstock. 


My last card is my favorite of the trio (am I allowed to say that?) and represents another use for the circle images.


I partially die cut a panel of rustic cream card stock and stamped the fronts and backs of the circles in shades of peach, melon, and apricot to create a bouquet of balloons.  I pieced a hole for each balloon, threaded some string through the holes and tied the strings together into a bow.


A small glue dot keeps all the strings in place.  I stamped Hello in apricot ink and adhered the stamped panel to a fine linen card base with foam tape.

Here's a look at this versatile set...


And I just so happen to have a Flower Circle stamp set to give away!  Just leave me a comment letting me know how you would use flower circles by Friday at 10 p.m. EDT. The winner will be announced on Saturday morning. 

Well that's all for me today.  Thanks for stopping by! 
Katie


Wednesday, June 18, 2014

Stamp Out Chaos- Ribbon, Twine and Washi


Please scroll down to the end of the post for my entry into the Moxie Fab World Photo Pocket Journaling Card challenge!

Hello friends,

It's time for another Stamp Out Chaos.  This week, Lindsay and I talking about storage and organization of twine, ribbon and washi tape.  If you missed a previous post in this series, you can catch up here.

First up- twine.  Previously I was keeping all my twine in a penny candy jar, but I found that the twine was getting rather tangled and matted, so I took some time one evening to unravel the twine and wrap it around wooden spools that I had on hand from another project.  Once that was complete, I stacked the spools of twine on a wooden thread holder.  I have another large spool of twine next to the thread holder and a small wooden crate holds some additional jute and rick-rack ribbon.


For washi tape, I decided to keep it simple and keep my rolls of tape in a three tier holder from Land of Nod.  It looks like Nod no longer carries this item, but I have seen similar containers at TJ Maxx and Homegoods.


Ribbon- Over the years I managed to horde, I mean collect, gobs and gobs of ribbon.  Since this is not an embellishment that I use frequently, a major purge was in order.  I sorted through all my ribbon and gave a large bag of assorted ribbons and some other crafty goodies to the Elementary School.  


Now all my most loved ribbons fit neatly in a jar. 


I searched Pinterest and found a few other awesome organizing ideas that I wanted to share:


This amazing twine and washi storage/display is from the Tried and True Blog


Jennifer Jones from I Heart Organizing (one of my favorite blogs) created this DIY washi tape organizer from an acrylic drawer organizer, some tension rods and deconstructed cellophane wrap containers.  Brilliant!

Now for a little crafty project using twine and washi tape.


I stamped a panel of pink cardstock with the woodgrain pattern from Avery Elle's Woodgrain and More set and adhered it to a white cardstock base.  Next, I stamped the "You're a Gem" sentiment from the Many Thanks set on a pocket page journaling card.  I pierced holes in the gem image and stitched the shape with black twine.  


 I adhered the journaling card to the pink panel and added a bit of washi tape at the top and bottom of the card.  A few silver sequins add just a touch of shine.

And since I totally used a photo pocket journaling, I am linking this bad boy up to the Photo Pocket Journaling Card challenge at Moxie Fab World.  You have until June 22, 2014 to get in on the fun!!!

Well that's all for me today; be sure to stop by Lindsay's blog to see what clever solutions she has in place for her washi, twine and ribbon.  Thanks for stopping by!

Katie


Sunday, June 15, 2014

Botanical Thank You Card {Paper Smooches SPARKS}

Hello and Happy Father's Day!

It's time for another Paper Smooches SPARKS challenge.  This week's theme is Anything Goes.

Behind the scenes, the SPARKS DT loves these Anything Goes weeks, but sometimes it's hard to pick a single idea to go with for the week, because you know, Anything Goes.

I decided that for the Anything Goes challenges, I am going to focus on working with my Paper Smooches sets that have not seen much inky love.  This week, its all about the Botanicals. (Confession: I have a bit of an allergy when it comes to floral stamp sets.  Don't get me wrong, I LOVE them, but I don't always know what to DO with them and how to make them work with my style.)  So here's what I came up with...


I started by stamping some of the floral silhouettes from Botanicals 1 and Botanicals 2 with Cranberry, Orange and Yellow ink.  To create depth without masking (because that would be a pain with these detailed images), I stamped the leaves with Versamark and then heat embossed with green embossing powder. 


I stamped a sentiment from Scripty Sayings in black ink and added a couple dragonflies from Botanicals 1 also in black ink to balance it out.  (Another confession: I had hoped that this would be a one layer card, but a rouge black ink smudge kinda ended that, so I trimmed down the white card stock panel and adhered it to a black card base.  Just remember, there are no mistakes in paper crafting... only opportunities for embellishment!)


So now it's your turn! You have until 11:59 PT on Saturday, June 21 to link up your take on this week's challenge to the Paper Smooches SPARKS blog for a chance to win a $30.00 gift certificate to the Paper Smooches store. Woot woot!  

Be sure to check out the amazing inspiration from the other members of the SPARKS design team playing along with this week's challenge: 


I can't wait to see what you create!  

Thanks for stopping by!
Katie


Friday, June 13, 2014

This Way to Birthday Fun Card {AE Challenge}

Hello and Happy Friday!

Today starts another AEI{heart}U challenge and this week's theme is DIY Stamped Paper.  I used  the Aim High set and came up with this:


I stamped the arrows from Aim High in lots of brightly colored inks.  I sort of pieced it together and figured out the pattern as a went along.  I stamped one of the sentiments from the set directly on the stamped panel before matting it to orange cardstock and adhering it to a green card front. 


To connect the stamped panel to the card base a little further, I added a few staples with my Tiny Attacher. (I love cute mini staples!) 


Well that's it for me today. Be sure to stop by the AEI{heart}U blog for even more inspiration from the design team and to link up your take on this week's challenge.  I can't wait to see what you create!  

Thanks for stopping by!
Katie

Thursday, June 12, 2014

Take 2 Thursday: Avery Elle's Brushed Birthday Card

ETA:  Whoopsie!  Lindsay and I got our wires crossed about which Avery Elle set we were using. She used Write It and I used Brushed.  Previously Lindsay used Brushed on this card and I used Write It on this card.  We'll be in sync next time- promise!!! :)

Hello friends!

I hope your week is going well!  Lindsay and I are back today with another Take 2 Thursday.  Take 2 Thursday is a just for fun feature that my crafty pal, Lindsay Amrhein, and I do every other week.  We pick a stamp set and offer up a couple of different ideas for using it on your projects.  If you would like to catch up on some of our other Take 2 Thursday posts, click here.


Watercoloring and the painted look in stamping is a hot, hot trend and we just love it, so this week, we are using the Brushed stamp set from Avery Elle.

I really love the bold watercolor strip featured in the stamp set, so I decided to create a striped ombre card. 


Starting at the top of a white card stock panel, I stamped the stripe in shades of pink moving from dark to light as I stamped down the panel.  The final pink strip is such a light pink that it's not coming across very well in the picture, but it's there- just very light.  I was able to achieve the lighter stripes through some generational stamping.


Once the ink was dry, I stamped the happy birthday sentiment in Versamark and heat embossed it with gold embossing powder.  I matted the stamped panel on a piece of gold foil card stock before adhering it to a white card stock base.   A few flat sequins finished off the card. 

Here's a look at the Brushed set: 


I just love the font and those stripes have so many possibilities!! Be sure to stop by Lindsay's blog today to check out her card! I know she will have something awesome!

Thanks for stopping by!!
Katie 

Tuesday, June 10, 2014

Love and be Loved Card {Waffle Flower Crafts}

Hello friends,

Waffle Flower Crafts introduced their second release last week and joining the Waffle Flower family of products are 4 stamp sets and 4 die sets.  Each of these sets was thoughtfully designed and over the next few weeks, I will be sharing ideas for each of them.

Today, I am sharing a one layer card I created with the Loved Stamp Set.  Loved is a set filled with gorgeous and unique floral images that you can use to create your own floral cluster or bouquet.


I have a small confession to share, I have a bit of a black thumb when it comes to floral stamp sets- I just can't seem to get them to work for me.  I was delighted to find that the Loved stamp set was super simple to work with.  All the images just fit together beautifully.


To start, I created a card from a piece of rustic cream cardstock and stamped the sentiment in the center with black ink.  Next I stamped the large leaves in Old Gold ink and the Laurels in Field Greens ink.
I stamped the bow and larger flowers in Sweet Nectar and Butter Bar ink and finally filled in with a few of the smaller floral images.


I filled in a few open spots with clusters of the dot stamp- which I believe is supposed to be a flower center- but it works as a dot too.  I tried to keep it pretty loose and organic looking, but these images were so fun to stamp, it was hard to know when to stop!!!

Well that's all for me today!  Thank you so much for stopping by!

Katie

Supplies:
Stamp set: Loved Stamp Set (Waffle Flower Crafts)
Card stock and envelope: Hollos Paper Crafts
Ink: Butter Bar, Field Greens (Hero Arts); Sweet Nectar, Old Gold (WPlus9); Black (Versafine)


Sunday, June 8, 2014

You Color My World Card {Paper Smooches SPARKS}

Hey everyone!

I hope you are having a splendid weekend!  Today starts another Paper Smooches SPARKS challenge. This week is a Picture Perfect Challenge and here is my take on the inspiration photo.


Seeing all those paint swatches on the wall made me think of paint so I die cut card stock with the wavy border from the Borders 1 die set.  I angled the die so that each color of card stock would create a point, then I nested them together and adhered them to a piece of white card stock. 

Next I stamped the paintbrush from the I Heart Art set and colored it in with Copic markers.  


I didn't want the sentiment to compete with the rainbow of cardstock and paintbrush (plus I was really digging the white space on the card, so I decided to stamp the "you color my world" sentiment from Headliners on vellum and adhere it towards the bottom of the card.  For narrow a strip of vellum like this, I ran it through my Xyron "X" sticker maker.  Because the entire vellum strip is covered with adhesive, the adhesive is not noticeable at all.  Finally, I adhered the completed panel on a kraft card base. 

Here's a look at this week's inspiration photo: 


Now it's your turn!! You have until 11:59 PT on Saturday, June 14 to link up your take on this week's challenge to the Paper Smooches SPARKS blog for a chance to win a $30.00 gift certificate to the Paper Smooches store. Woot woot!  

Be sure to check out the amazing inspiration from the other members of the SPARKS design team playing along with this week's challenge: 


I can't wait to see what you create!  

Thanks for stopping by!
Katie

Wednesday, June 4, 2014

Stamp Out Chaos- tools and a video!

Hello!

I am back today with another installment of Stamp Out Chaos.  Henceforth to be known as the #neverendingcraftroomcleanup.  If you'd like to catch up on our progress to date, you can check out all Stamp Out Chaos posts here.


This week Lindsay and I are talking tool storage, AND I have something a bit different for you today- a video. What?! Yep!  I made my very first crafty video and I didn't die- no pun intended.  (While no craft supplies were harmed in the making of this video, I was slightly mortified at all the "umm's" and "actually's" that snuck into my rambling... seriously, it's bad, but could make for a fun drinking game someday.)  So without further ado, watch and enjoy!


Some of the sources I mentioned in the video:
  • Magnetic vent covers- I picked these up at Home Depot for around $5.00 for a set of 3.  The measure 8"x15".  I have both nailed them to the wall AND cut them and put them in vinyl pockets to store nesting and coordinating dies.
  • Simon Says Stamp- Clear Storage Pockets- These pockets measure 5"x5" and I use them to store lots of my nesting dies. 
  • Adhesive pouch from VinylEnvelope.com- I adhere these pockets to cardboard and use them to hold dies that are larger than 5" x 5" 
And before I go, a card I made with my very favorite type of tool... dies!

For this card, I inked up a few Avery Elle sets including Weather It and dies, Texture Tiles: Be Cool and Woodgrain and More.

First, I stamped the thatched background from Woodgrain and More in Pink on some light pink cardstock.  Next, I die cut the umbrella and clouds from Weather It from a bright pink and light blue cardstock. I stamped the outlines, then added some more interest by stamping polka dots on the clouds and tiny triangles on the umbrella. 

I adhered the clouds to the card and stamped the raindrops in blue pigment ink- I love how bright and vibrant this ink looks!  It's Bahama Blue by Memento Luxe. Finally, I stamped the sentiment in navy ink.  


Be sure to stop by Lindsay's blog to check out how she stores her tools-I LOVE that she found a way to get them off her desk... I am going to have to borrow that idea! 

Well, that's all for me- thanks for stopping by!
Katie