Saturday, May 24, 2014

Father's Day Card {Waffle Flower Crafts}

Hi friends!

Happy Saturday!  I am just popping in to share a Father's Day card that I created with Waffle Flower Craft's Hey Mr. stamp set.   Hey Mr. is such a great masculine set, and I adore the graphic tool set that Nina designed.

Using the tool images, I was able to stamp a pattern that looks just like a piece of patterned paper and I snapped a few pics along the way to show you how.


First I arranged the tools on my craft mat in a block formation.  I used the gridlines on my mat to ensure that the tools were straight and squared up.  Next I placed my acrylic block on the stamps and picked them up.

Next, I pressed the stamps into an ink pad and stamped them repeatedly.  I started in to bottom right corner and moved left before moving up the card.  I took care to stagger the stamped image to create a more interesting pattern.    I used a piece of printer paper under my project to catch the stray stamped images. 


I stamped the sentiment on a green bordered label that I had in my stash.  I trimmed the stamped panel and wrapped some twine around it in an "X" formation before adhering it to a kraft card base.  I trimmed the edge of the label and adhered it to the card with foam tape. 

Well that's all for me today!  Thanks so much for stopping by!  

Katie

Wednesday, May 21, 2014

Stamp Out Chaos- Striving to Simplify

Hello friends,

I am afraid I don't have much to share today in terms of pretty pictures showing off all the progress I have made on my space.  It's the end of the school year and my time is being spent helping the kids with their end of the school year projects (including creating a traditional Swedish children's outfit from Goodwill finds + ribbon and trim picked up at Jo Ann Fabrics AND whipping up a crock pot of Swedish Meatballs to feed an army of hungry 4th graders for their International Buffet... seriously, Heritage Day, I am looking at you).

Lindsay and I embarked on our journey to Stamp Out Chaos a couple months ago, and I did want to take some time to share some of my thoughts and what I am learning through this process.  Recently, I have been drawn more and more to practicing minimalism in my home.  Now I am not talking 'bare walls and mattress on the floor' minimalism, but a rational minimalism that makes sense for a busy family of 4. Living with what is truly essential and necessary- nothing more, nothing less.

I have come to the realization that I am a really bad manager of stuff- my husband's stuff, my kids' stuff, and if I am being honest, my own stuff too.  I function best in an orderly environment, but over the years, between working full-time, the family, church and community commitments, I have been conditioned to survive in some degree of chaos.  It's not an ideal fit.

This most certainly applied to what what happening in my creative space.  I felt like I was spending more time organizing and maintaining my crafty stash than I actually spent creating and something had to give.  In my reading on minimalism, I came across the following quote from Joshua Becker of Becoming Minimalist, who said "owning less is far more beneficial than organizing more."


This spoke to me in a profound way.  In some ways, the evolution of my personal card-making style also supports the pursuit of simple, but it wasn't really until it was pointed out to me (a couple of times because I can be dense like that...) that it began to seep in. 

Last week, on Plugged in with Paper Crafts and Scrapbooking blog Kerri Miller highlighted a few of my cards and wrote about the importance of sticking to your style, mine being clean and unfussy.  In April, in writing my introduction for the Waffle Flower Crafts Design team, Nina wrote "I also love that she can create something very unique from very simple supplies." 


Now, I am not attempting to #humblebrag here.  It is just funny to me that other's can see clearly what can elude you for so long.  I have struggled for years to define my style and here it was, spelled out clearly that my most successful designs are those that are clean, simple, unfussy with a twist.  

Needless to say, there was a whole lot of fussiness happening in my craft room, and I needed to reassess and rationalize my space in order for it to support me creatively. Big changes seem to be in order and LOTS of them. 


And while change can be hard and require a lot of patience, I know that it will be worth it.  

What's changing first? 
Let's talk about this blog.  Don't worry, I am not abandoning it, but I will be changing it's look and title in the coming week.  When I selected "our charmed life" back in 2008, I started the blog as a place to share family stories and pictures.  I was much more of a scrapbooker back then and the name was actually inspired by a title card from My Mind's Eye.  It quickly evolved to be more of a platform for my paper crafting and I feel that it's name should somehow represent my approach.   

That's all for me today, but more to come on this topic including some about the process that I am using to take stock and reassess my space and supplies.  And now that I have rambled on and on, how about you?  Do you feel that your crafty environment reflects your style?   How so?  Do you think that's important or is the final product all that really matters? Do you practice some level of minimalism in your life?  I would love to hear your thoughts!  

Thanks for stopping by! 
Katie

Friday, May 16, 2014

AE Challenge: Botanical Note Card

Hi there!

Happy Friday!  It's time for another Avery Elle I {heart} U challenge!  It's finally spring around these parts, so our challenge is to make cards that feature botanicals.


Here's my card: 


On a piece of white card stock, first I stamped the small bottle from Bottle It Up in navy ink and added the raindrops from Weather It in lighter blue ink.  I masked the bottle and stamped the woodgrain pattern from Woodgrain and More to serve as a table top.    While the bottle was masked, I added a couple of the small succulents from the Bottle It Up set poking out of the top of the bottle. 


Lastly, I stamped the sentiment (also from Bottle It Up) in navy ink and rounded the bottom corners.  

Be sure to stop by the AEI{heart}U blog for even more inspiration from the design team and to link up your take on this week's challenge.  I can't wait to see what you create!  

Thanks for stopping by!
Katie


Thursday, May 15, 2014

Take 2 Thursday: Studio Calico Get Well Card


Hello friends, 

I can't believe that it's already Thursday!  Where has this week gone?  My friend Lindsay and I are back today for another Take 2 Thursday.  This week, we are using the stamp set from Studio Calico's March 2014 kit- Office Hours and here's my take: 


I never seem to have enough Get Well cards in my stash and unfortunately, need for Get Well wishes often arise without warning, so I need to do a better job of keeping them on hand.  This card is a step in that direction. 


I stamped and masked the clouds and added colorful raindrops, plus signs and umbrellas.  I stamped  the sentiment at the very bottom of the panel with gray ink.   I adhered the stamped panel to a piece of adhesive backed cord that I had attached to a Fine Linen card base.  I added a heart-shape wood veneer that acts as a push pin. 

Well that's all for me today, be sure to stop by Lindsay's blog to see her take with this kit.  

Thanks for stopping by!
Katie


Saturday, May 10, 2014

Waffle Flower Crafts: You Rock My World Card

Hello friends and happy Saturday!

Today, I wanted to share a card I made with Waffle Flower Crafts Rock My World stamp set.  I was looking for inspiration on the internet and came across this awesome print from Minted.


I loved the colors and the simple design in this print.   Here is my take. 


On a piece of white card stock, I stamped the rocks in blue, pink, orange and black ink.  The orange and black rocks were created by inking and stamping the back side of the Live, Laugh, Love and Life is Beautiful rocks.  Stamping the back sides of your clear stamps is just another way to get more milage from your stamps.  


I stamped the sentiment in black ink and then had to figure out how to achieve the cool stripes on the rocks from the inspiration picture.  


After a few failed attempts at masking, I decided to pull out my paper piercer, needle and cream twine and stitch twine around the rocks.  In the end, I was really happy with the contrast between the graphic rocks and the rustic twine.  I adhered the completed card stock panel on a Fine Linen card base with some foam tape. 

I am also sharing this card with the Virginia's View Stitching challenge. 


Well, that's all for me today!  Thank you for stopping by!

Katie

Wednesday, May 7, 2014

Stamp Out Chaos: Embellishments


Hello there friends,

Lindsay and I are back today with another step in our journey to Stamp Out Chaos.  This week, we are tackling the "underembellie" of crafty organization- embellishments!  If you missed an earlier post or what to see where we started, check it out here.

From hardware organizers to tackle boxes, there are so many options for organizing the little things and do-dads of our hobby.  Over the years, with embellishments particularly, I have learned that I need to see them in order to remember to use them.  At the same time, they need to be contained and organized.  After MUCH trial and error, here are some options that have been working for me...


I have been keeping all of my wood veneer, metal, flair, resin, etc in plastic bead organizers that I picked up at Hobby Lobby.  Pretty much any embellishment that is on the small side and come in a package containing multiples winds up here. These organizers are inexpensive and great for travel.  They also stack quite nicely in one of the cubbies of my Expedit. 


Enamel dots get their own storage box.  I picked this one up in the unfinished wood craft area of Hobby Lobby.  I will get around to painting it soon, but for now, it does it's job.  You will notice that I remove the dots from their original packaging.  They are simply easier to access for me that way.  I can generally recall manufacturers and usually buy dots from the same 2-3 makers.  Another idea would be to affix a simple dot label to the back of the clear sheet with the initials of the manufacturer.      When not in use, this box sits on a shelf above my work area. 


This organizer from Land of Nod sits on the corner of my desk or the shelf above my desk.  Unfortunately, I think it may have been discontinued, it was a part of the "I could have bin a container" series.   It holds lots of supplies for Project Life and embellishments that are a bit random- they may be large or oddly shaped and therefore, won't fit into one of my other solutions, so they hang out here until I am ready to use them. 


Sequins!  So I tried storing sequins in one of the bead boxes that I use for my wood veneer and that was a bit of a mistake.  The bead box lid does not prevent the sequins from co-mingling which can easily happen when traveling or if the box is jostled in the slightest bit.  Lindsay actually found this brilliant solution in the beading section of JoAnn's and I happily borrowed a page from her book of tricks.  I love that all the containers have their own screw-on lids, so my colors stay tidy.  I am not sure that the acrylic box that holds all the sequin pots is sturdy enough for tough travel conditions, but I have been using this for a few months and it has served me well.  I see in the picture above that I only have two open spots remaining.... hmmm... I may need to pick up another one.


This shelf is hung above my craft desk and I decided to put the scrolled brackets to use by resting a metal dowel rod on the brackets and using curtain clips to hang us packets of die cuts, sticker letters and other embellishments.  Previously, these items sat in a basket and I would forget that they were there.  I am really happy with this arrangement because they are visible and let's face it, crafty products are just inspiring to look at!

So with all these freshly organized inspiring embellishments at my disposal, I decided to make a card featuring three different types of embellishments- stickers, wood veneer and sequins.


These cute little wooden umbrellas came in my March Studio Calico kit.  Umbrellas always make me think about Mary Poppins, so I stamped a London Skyline using Papertrey Ink's City Scene set.  


I didn't have a sentiment that would work for this card, so I made my own by combining some stickers from My Mind's Eye with a computer generated sentiment.  The font I used is called Sofia. 


A few sequins finish off the card.  Speaking of Sofia or Sophie in my case, I was trying a different angle to photograph the card and I got photobombed by Alvin from Alvin and the Chipmunks.  Say it with me now.... ALVIN!!!


Well, that's all for me today.  Please be sure to stop by Lindsay's blog to a peak into how she organizes her embellishments!  We'll be back in a few weeks with another area of the crafty room to tackle.  Can't wait!!  

Thanks for stopping by! 
Katie


Monday, May 5, 2014

Can you felt it? Waffle Flower Blog Hop

Hello everyone! 

Welcome to Can You Felt It? - Waffle Flower Blog Hop! Today is the 5th of the month and also the day that the design team girls get together and share some fun craft projects using our newest stamps and dies released in April. 

If you came from Joni Andaya's blog, you are right on track!  If not, stop by the Waffle Flower blog to pick up the entire hop order.  


We teamed up with Benzie Design and are sharing some felt projects today!  I used the Electric Company collection of colors, the Notions stamp set and the Mailable 3D Bow Template Die to create a little gift set for my daughter who is beginning to learn how to sew. 


For the card, I stamped the buttons from Notions onto green cardstock in a random pattern.  To create the tomato pin cushions, I die cut ovals from the Magenta and Flamingo felt and then hand cut a pair of wonky stars from the Chartreuse felt to make the stems.  I inserted a few stick pins before glueing them to a piece of white card stock.  


An orange mat with a scalloped edge and a bit of blue twine to match the sentiment finished off the card.   I love how the two pin cushions look like a mama and little one.  This card might also make a nice Mother's Day card for a crafty, sewing mama. 

I also made a needle book and some bow-topped T-pins to add some fun pieces to her new hobby.  


For the needle book, I die cut some Magenta felt into a long rectangle shape.  The page's of the book were made from the Flamingo felt.  I simply stitched through all the layers of felts down the center to create the book.  I added a fun bow detail with the Mailable 3D Bow template die and Chartreuse felt.  

Here's a look at the inside of the book: 


I trimmed the needle book pages with pinking shears to add a fun detail.  Now, she has a special place to keep pins and needles. 

Lastly, the felt pins...


These were super easy to create.  I die cut more 3D bows from the felt- Cyan, Orange and Chartreuse and during assembly, I added some glue and a T-pin through the center. 

Here's one last look at my projects...  


I think she is going to love them!  

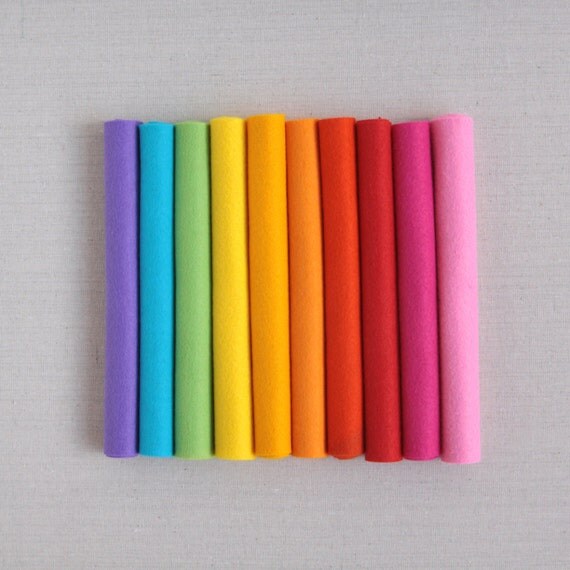
This is the gorgeous felt collection from Benzie Designs that I used in my projects: 


Giveaway!
You can't have a hop without prizes!  Leave comments along the way for chances to win a stamp set of choice from Waffle Flower Crafts. Enter before midnight Eastern on May 8 and the winner will be announced on Waffle Flower Blog on May 9th.

Special Discount for All
Enter WAFFLE10 for 10% off at Benzie Design. Valid through May 31st, 2014

That's it for me today!  Your next stop is Kim Kesti! 

Thanks for stopping by!!
Katie