Showing posts with label Craft Room. Show all posts

Monday, April 10, 2017

My Creative Space {CardMaker Magazine Blog}

Hello friends,

I am on the CardMaker Magazine blog today sharing some pictures of my craft room.  I've got loads of pictures over there, but in the meantime, here's a sneak peek.


A few months ago, I made a big move and brought my craft room downstairs from a spare bedroom to a room that is located just off the kitchen.  I love my new space, as I am around my family more, but it was tricky figuring out how to fit all my existing stuff into a room that features a wall-long fireplace hearth and lacks a closet. 

I am planning to do a video of my new space in the coming weeks just as soon as I can get over a rather persistent case of laryngitis. :)

I hope you will stop by the CardMaker Magazine blog to take a look.

Thanks for stopping by!
Katie

Wednesday, January 7, 2015

Stamp Out Chaos: The Reveal

Good morning friends,

It's been WAY too long, but today, Lindsay and I wanted to start wrapping up our Stamp Out Chaos series by sharing with you some pictures of our crafty space.


If you want to catch up on my other organizational hijinks and shennanigans including some really scary before photos, click here

One of the pieces of furniture that has worked really well for me is the Ikea Expedit.  I think it goes by another name now, but I started with a 4 x 4 unit and added a 4 x 2 unit and placed it on top taking the storage up to the ceiling and I love it.  The top cubbies hold my scrapbook albums, some project life supplies and the baskets contain extra card stock as well as memorabilia and items for particular album projects. 

The Expedit also holds my stamp collection in Avery Elle storage envelopes and Fridge Binz.  I use divided plastic boxes to contain wood veneers, metal embellishments and a floral storage box to corral stickers and sticker letters.  


I also added drawers to the bottom two rows of Expedit cubbies.  These drawers hold supplies like stencils, paint, specialty tools (punch boards), felt, fabric, bling, buttons, envelopes, bags, and tags. 

To the left of the Expedit is a large bulletin board.  I painted the board white before stenciling a trellis pattern with cheerful yellow paint.  


Moving into my work area, I have the aqua Raskog cart adjacent to my desk.  I used an Antonius insert to organize my working stamps and supplies- including 6 x 6 paper pads, adhesive and my stamp press.


The two remaining shelves hold project life cards and supplies. 


Tucked under my desk is my Elfa File Cart- this holds most of my "good" card stock and has 3 baskets below perfect for holding paper scraps. 


I found these bright yellow desk accessories at TJ Maxx.  I am using them to hold mini ink cubes, post it notes and other bits and bobs for crafting. 


The Pro Ink Organizer from Organize More is hung on the wall above the corner of my L-shaped desk. Sophie gave me the "World's Best Mom" foam sign last year for Christmas and was insistent that it be displayed in my room.  


I have a dedicated space on my desk for my computer and Silhouette portrait.  Sometimes, the crafty mess migrates to this area, but I do try to keep this area tidy.  

Above the desk, my hubby also installed a shelf that I use to hold ribbons, patterned paper scraps and project life embellishments.  I picked up a metal rod at the hardware store and used some clip-it-up clips to hold some packaged embellishments.  With embellishments in particular, I seem to need to see them in order to remember to use them.  


This is the Making Memories embellishment center and it's super handy for keeping items in close reach, but off my desk.  Currently, it's holding the Mini Distress Ink Cubes and Storage Tins that I received for Christmas as well as stamp storage pockets.  

Below the center is a Bygel rail and 4 containers.  I use this to hold pens and other tools and supplies that should be in close reach.  I recently added a dry-erase calendar to my space to help me track crafty assignments and blog posts and with some techniques tending towards the messy side these days, I thought a paper towel holder might come in handy.  


I have a couple accent shelves on the other side of the window and use them to hold twine, scissors, markers and a few special projects. 


This area is directly across the room from my desk.  This is where I house my paper trimmer, die cut machine and giant wall of die storage.  The cubbies below (more of the Expedit series) hold photos, books, 12 x 12 paper and 8 x 8 paper pads


These two wall units were lucky finds.  One of my girlfriends used to sell Mary Kay and her Father in Law built her this unit to hold her eyeshadow refills.  When she stopped selling, she offered it to me.  It works perfect for organizing embossing powder and displaying a few wood-mount stamps. 

Below is a wooden cassette holder that I use to mostly organize my pigment inks.  I found this on Craigslist for $10.00.  Some day I may get around to painting it white to match the rest of the room.  


Next week, I am planning a post that will contain links to the resources I used when putting together the room as well as some lessons learned along the way.  Until then, please let me know what questions you have or if there is anything that you would like to see in more detail, and I will get back to you!  

Don't forget to check out Lindsay's new space too!  It's pretty fab! 

Thanks so much for stopping by! 
Katie

Wednesday, June 4, 2014

Stamp Out Chaos- tools and a video!

Hello!

I am back today with another installment of Stamp Out Chaos.  Henceforth to be known as the #neverendingcraftroomcleanup.  If you'd like to catch up on our progress to date, you can check out all Stamp Out Chaos posts here.


This week Lindsay and I are talking tool storage, AND I have something a bit different for you today- a video. What?! Yep!  I made my very first crafty video and I didn't die- no pun intended.  (While no craft supplies were harmed in the making of this video, I was slightly mortified at all the "umm's" and "actually's" that snuck into my rambling... seriously, it's bad, but could make for a fun drinking game someday.)  So without further ado, watch and enjoy!


Some of the sources I mentioned in the video:
  • Magnetic vent covers- I picked these up at Home Depot for around $5.00 for a set of 3.  The measure 8"x15".  I have both nailed them to the wall AND cut them and put them in vinyl pockets to store nesting and coordinating dies.
  • Simon Says Stamp- Clear Storage Pockets- These pockets measure 5"x5" and I use them to store lots of my nesting dies. 
  • Adhesive pouch from VinylEnvelope.com- I adhere these pockets to cardboard and use them to hold dies that are larger than 5" x 5" 
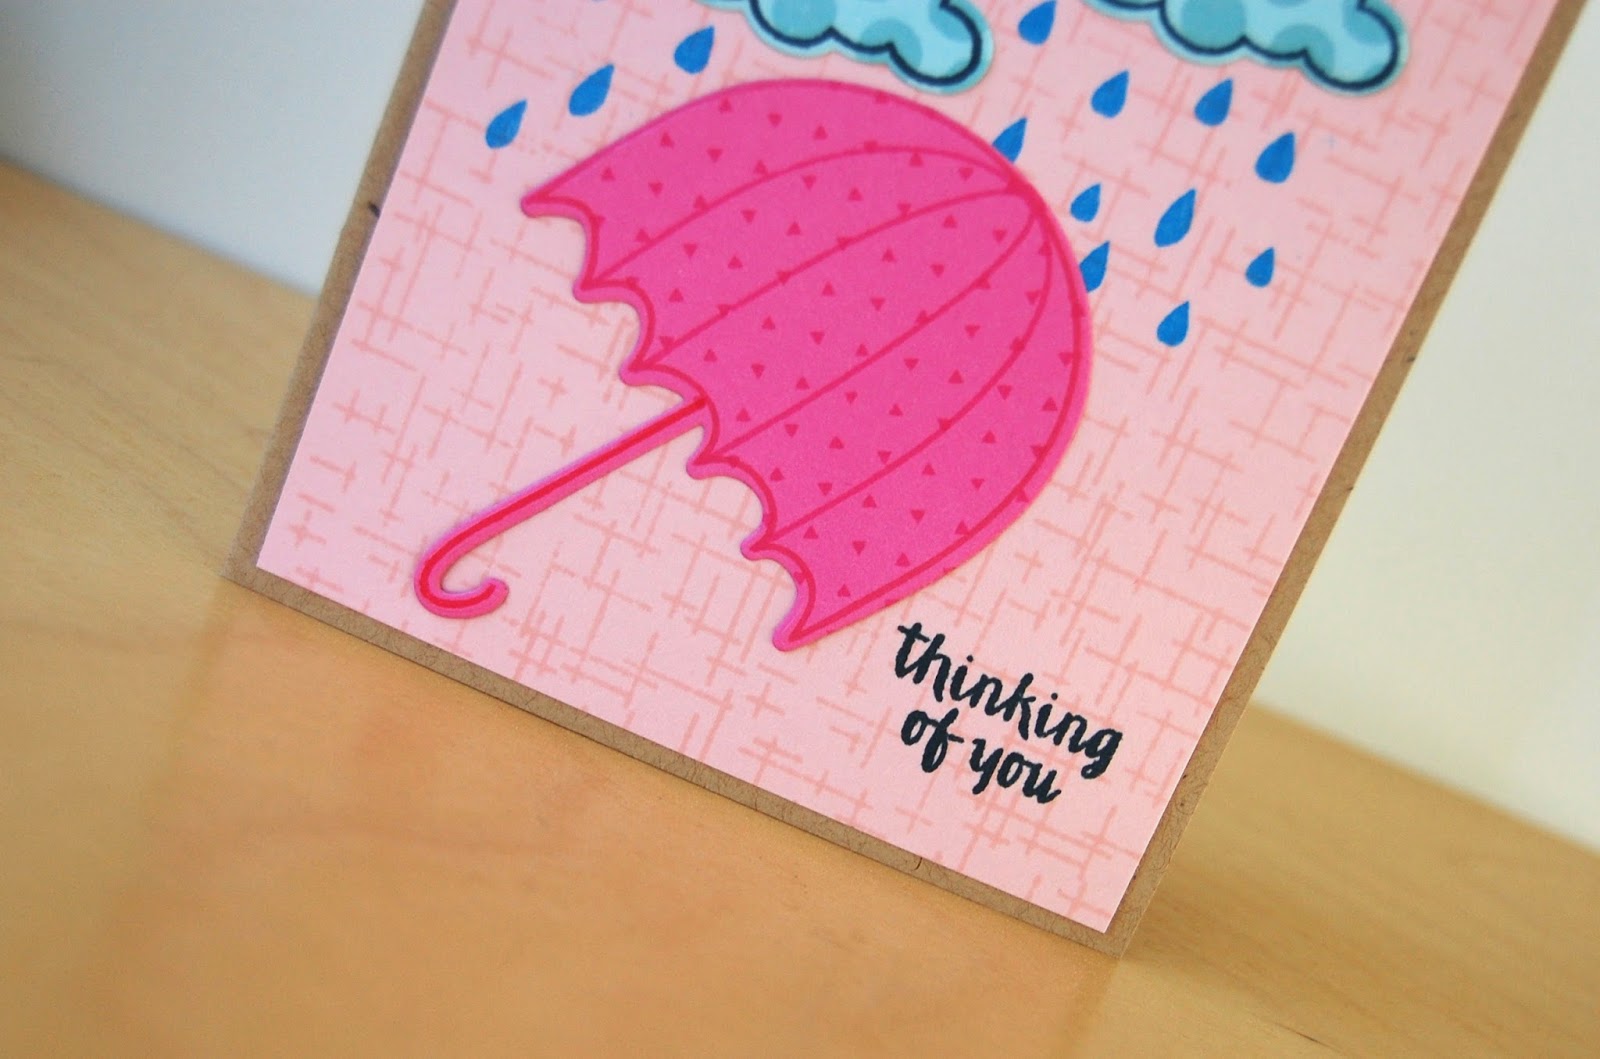
And before I go, a card I made with my very favorite type of tool... dies!

For this card, I inked up a few Avery Elle sets including Weather It and dies, Texture Tiles: Be Cool and Woodgrain and More.

First, I stamped the thatched background from Woodgrain and More in Pink on some light pink cardstock.  Next, I die cut the umbrella and clouds from Weather It from a bright pink and light blue cardstock. I stamped the outlines, then added some more interest by stamping polka dots on the clouds and tiny triangles on the umbrella. 

I adhered the clouds to the card and stamped the raindrops in blue pigment ink- I love how bright and vibrant this ink looks!  It's Bahama Blue by Memento Luxe. Finally, I stamped the sentiment in navy ink.  


Be sure to stop by Lindsay's blog to check out how she stores her tools-I LOVE that she found a way to get them off her desk... I am going to have to borrow that idea! 

Well, that's all for me- thanks for stopping by!
Katie

Wednesday, May 21, 2014

Stamp Out Chaos- Striving to Simplify

Hello friends,

I am afraid I don't have much to share today in terms of pretty pictures showing off all the progress I have made on my space.  It's the end of the school year and my time is being spent helping the kids with their end of the school year projects (including creating a traditional Swedish children's outfit from Goodwill finds + ribbon and trim picked up at Jo Ann Fabrics AND whipping up a crock pot of Swedish Meatballs to feed an army of hungry 4th graders for their International Buffet... seriously, Heritage Day, I am looking at you).

Lindsay and I embarked on our journey to Stamp Out Chaos a couple months ago, and I did want to take some time to share some of my thoughts and what I am learning through this process.  Recently, I have been drawn more and more to practicing minimalism in my home.  Now I am not talking 'bare walls and mattress on the floor' minimalism, but a rational minimalism that makes sense for a busy family of 4. Living with what is truly essential and necessary- nothing more, nothing less.

I have come to the realization that I am a really bad manager of stuff- my husband's stuff, my kids' stuff, and if I am being honest, my own stuff too.  I function best in an orderly environment, but over the years, between working full-time, the family, church and community commitments, I have been conditioned to survive in some degree of chaos.  It's not an ideal fit.

This most certainly applied to what what happening in my creative space.  I felt like I was spending more time organizing and maintaining my crafty stash than I actually spent creating and something had to give.  In my reading on minimalism, I came across the following quote from Joshua Becker of Becoming Minimalist, who said "owning less is far more beneficial than organizing more."


This spoke to me in a profound way.  In some ways, the evolution of my personal card-making style also supports the pursuit of simple, but it wasn't really until it was pointed out to me (a couple of times because I can be dense like that...) that it began to seep in. 

Last week, on Plugged in with Paper Crafts and Scrapbooking blog Kerri Miller highlighted a few of my cards and wrote about the importance of sticking to your style, mine being clean and unfussy.  In April, in writing my introduction for the Waffle Flower Crafts Design team, Nina wrote "I also love that she can create something very unique from very simple supplies." 


Now, I am not attempting to #humblebrag here.  It is just funny to me that other's can see clearly what can elude you for so long.  I have struggled for years to define my style and here it was, spelled out clearly that my most successful designs are those that are clean, simple, unfussy with a twist.  

Needless to say, there was a whole lot of fussiness happening in my craft room, and I needed to reassess and rationalize my space in order for it to support me creatively. Big changes seem to be in order and LOTS of them. 


And while change can be hard and require a lot of patience, I know that it will be worth it.  

What's changing first? 
Let's talk about this blog.  Don't worry, I am not abandoning it, but I will be changing it's look and title in the coming week.  When I selected "our charmed life" back in 2008, I started the blog as a place to share family stories and pictures.  I was much more of a scrapbooker back then and the name was actually inspired by a title card from My Mind's Eye.  It quickly evolved to be more of a platform for my paper crafting and I feel that it's name should somehow represent my approach.   

That's all for me today, but more to come on this topic including some about the process that I am using to take stock and reassess my space and supplies.  And now that I have rambled on and on, how about you?  Do you feel that your crafty environment reflects your style?   How so?  Do you think that's important or is the final product all that really matters? Do you practice some level of minimalism in your life?  I would love to hear your thoughts!  

Thanks for stopping by! 
Katie
Wednesday, March 26, 2014

Stamp Out Chaos


Hello friends, 

Today is the start of a little something different here at Our Charmed Life.  For the next several weeks (months really), my dear friend, Lindsay, from Note to Self, and I are peeling back the curtain to share our journey towards a better organized and better functional crafty space.  We are calling it Stamp Out Chaos. 


I am fortunate to have a dedicated room in our home where I can create and pursue crafty endeavors. A few short months ago it looked like this... mostly... it was particularly clean on the day I snapped these photos.  


While the space worked well overall, there were a few things that I wanted to tweak.  
  • Additional desk space in the form of an L-shaped unit. 
  • Carve out a dedicated spot for my laptop and printer (hence L-shaped desk).  
  • More drawers- my stash includes lots of bits and bobbles and I was tired of looking at everything all the time and drawers are handy to organize and put away.
  • Ribbon- I adored my dress form, but I haven't been using ribbon much lately and it was taking up a lot of space for a supply that was was not being used. 
  • Space for my Scrapbook/Project Life Albums.
So in November, I passed along my crop in style cubes and DIY desk to Lindsay and took a field trip to IKEA.  I purchased another 2 x 4 Expedit (which I stacked on top of my 4 x 4 unit), an L-shaped desk and many, many drawer inserts for said Expedit. 

And today, my crafty room looks like this (Warning: if messy rooms give you an eye-twitch look away now): 


I know.  It's bad.  Don't judge.  Well, judge if you must, just don't tell me about it.  ;)

So what the heck happened?  Well, a lot, and most of it ended up on my desk and some of it on the floor.  LOL!   I think what it comes down to is being in a huge hurry to get the space set up that I did not set up the space to fit my needs and work habits.  It's just not working and the effects are evident. 

In addition, there's a lot of change taking place in this small space...  I had to get a new laptop (hence the 2 computers on the desk), my old trimmer died and needed to be replaced and I started exploring new storage solutions for my ink, dies and cardstock- couple all that with school projects with the kids and limited crafty time, it's no wonder the room sort of threw up everywhere. 

Needless to say this is not an environment conducive to creativity without ample frustration, so I am on a mission to Stamp Out Chaos!  I long for a space that is simple, streamlined, and functional. 

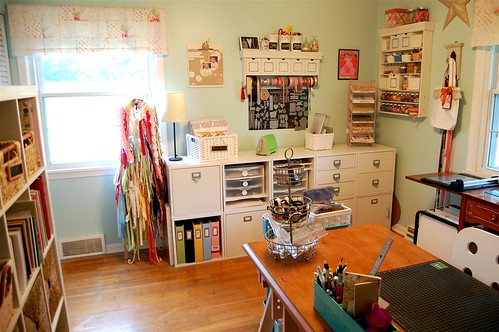
Something like this: 


Or this- I adore the white with touches of pink. 


I love this bright and cheerful space.  I'm thinking about creating a focal wall in my space- more to come on that.


Change is not going to happen overnight.  This will be a journey, and I hope that you will find value in coming along for the ride.  Every other week, Lindsay and I plan to explore a different supply, share a few ideas along with the solution we chose to implement.  I would also LOVE your advice!  If you have any rockstar tips for keeping your space organized and efficient, please leave me a comment and let me know!  As you can see, I need all the help I can get!  

We will be tackling basic supplies in 2 weeks- think ink, cardstock, patterned paper and stamps.  I can't wait to get started and bring back some order and the joy to my crafty space.

Thanks for stopping by!
Katie 

Monday, June 17, 2013

Craft Room Tour

Good morning!

I hope you had a lovely weekend.  Mine was the perfect balance between play and getting stuff done around the house.  Love that!

One of the items I get to cross off my to-do list is taking some pictures of my crafty space that I am sharing with you today.  Before I get to the pictures, just a couple disclaimers....
  1. I am incredibly blessed to have this space. The house we bought 6 years ago had one extra bedroom and over time it evolved into the mom cave. It it the smallest bedroom, measuring about 10 x 11 and features a few odd nooks due to the closet configuration in the next bedroom.  The room is the hottest in the summer and the chilliest in the winter, but I am still so, so fortunate to have this dedicated room. 
  2. This space has been cultivated over time.  I have been collecting pieces and odds and ends over the past 4-5 years, upgrading storage when I could afford to do so and when I happened to come across good deals and clever ideas. 
  3. I am sharing the room in it's particularly clean state.  Just keeping it real, but you should know, it almost never looks like this. I am usually frantically working on projects or submissions so there is usually crafty vomit all over my desk...and sometimes the floor.  Oh and the closet is nicknamed "The Closet of Shame" and it has a tendency towards vomit as well, but that is for another day. 
So without further ado, let's take a look around....

Katie Gehring-Craft Room 1

This is the view of my room from the doorway. The desk is to my right and a 4 x 4 Expedit is on my left.  On the back wall are my Cropper Hopper cubes which also serves as a work surface and die cut area. 


Katie Gehring-Craft Room 3

Stepping into the room and closing the door, I tried to make use of every bit of space in the room.  On the door, I hung a shoe/accessory organizer that I purchased at Bed Bath and Beyond.  The adjacent wall holds most of my wafer thin dies from various makers.  The black sheets are magnetic vent covers that I picked up at Home Depot.  As my collection of dies grows, I just purchase additional packs of covers and nail them to the wall.


Katie Gehring-Craft Room 2

This is my Ikea Expedit.  I opted for the 4 x 4 unit and it fits this wall perfectly.  The cubbies hold tons of supplies from my 6 x 6 paper pads to my stamps, idea books, embellishments, paper and more.  The unit next to the Expedit holds stamps that are still stored in CDs or DVD cases. 


Katie Gehring-Craft Room 4


These crop in style cubes were among my first purchases from my crafty space. I bought them one at a time from JoAnn's with a coupon over a period of several months.  These drawers and cabinets hold supplies that I need to access on occassion- like glitter, cork, scrapbook album refills, etc.... I store my newest 12 x 12 scrapbook paper in the basket to the left.  8 x 8 paper pads occupy a pink paper rack on the right.  The center space is die cut central.  My Cuttlebug and it's cutting plates and folders live there and I hung some vent covers on the wall to hold my most frequently accessed dies.

Katie Gehring-Craft Room 12

The ribbon holder is by Making Memories and was one of those crazy awesome deals that I stumbled upon at Tuesday Morning.  I think the unit originally sold for somewhere around $60.00 and I found it for $5.00. 

Katie Gehring-Craft Room 5

Continuing around the room, I have another Making Memories Embellishment center.  This one I picked up at Micheal's. It holds my buttons and all kinds of crafty bits and bobs.  The white rectangles in the open cubbies are my Stampin' Up ink pads.  

Katie Gehring-Craft Room 6

My paper trimmer and my grandparent's sewing machine are behind my workspace for easy access. 

Katie Gehring-Craft Room 11

I have another 2 x 2 Expedit unit behind my desk.  Up top, I keep my printer and a little unit that holds all my Project Life journalling cards.  The cubbies hold 8.5 x 11 and 12 x 12 cardstock, photos, and alterables. On the shelves, I keep some frequently used tools and supplies like adhesives, specialty scissors, gems and pearls, Mod Podge, etc...

Katie Gehring-Craft Room 7

One of the recent changes I made in the room was to position the desk so that it extends out into the room.  This change gave me access to more wall space and I have super easy access to even more supplies like my ink pads and the assortment of crafty necessities on the storage rails.  Previously the desk was positioned flush up against the wall and I had to reach over the top of my desk to get to my ink or post its.  Plus it really shows off the mess of cords and the surge protector that like to hang out around my desk. 

Katie Gehring-Craft Room 9

I store most of my ink pads in a wooden cassette holder that I found on Craigslist a few years ago.  It set me back $10.00, but it was located an hour from my house. One of my newest obsessions, washi tape, has found itself a home on a spool holder purchased at JoAnn's and hung to the wall with Command Adhesive by 3M- no nails or screws- BONUS! 

Katie Gehring-Craft Room 8

So the desk top was another lucky bargain find.  I was shopping in the closeout area of Marc's (Discount store in NE Ohio) and found a stack of these table tops.  It cost $3.95.  It's heavy as all get out, but I just knew that it would make a perfect working surface.  The desk legs and cart are from Ikea.  On the wall above my desk, a simple nail holds my Silhouette Portrait Mat and a clipboard.  Artwork from my kids and family pictures are sprinkled throughout the space.

Well, that's it for the "around the room" tour of my crafty cave.  It's still a work in progress, I would love to add labels to the drawers and cabinets and do something to tame that mess of cords.  Also, my photo and memorabilia organization needs some serious help.

I have a couple more posts planned for this week to share a few more storage elements in the space, but if you have any questions or suggestions, I would love the hear them, just leave me a note!

Thank you so much for stopping by!  Make today wonderful!

Katie