Wednesday, June 26, 2013

Showing you my man card(s)

Hello friends, 

A couple weeks ago, Paper Crafts Magazine had a call for masculine cards.  I have to admit that masculine cards are a challenge for me.  I have two daughters and am a bit of a girlie girl myself, so manly cards don't come easily.  

I do love a challenge, so I tried to dig deep and find my inner "man card" and I managed to create and submit a few cards and had a couple picked up.  I thought I would share two of the cards I created that were not selected, but I love just the same. 

This card was created with stamps and dies from My Favorite Things stamps.  The patterned papers are from the Hipster Collection by Basic Grey. I inked the edges of the cardstock and the  feather diecuts to add a little rustic flair. 


The second card is a bit on the fun and cute side, but it's punny, and my hubby loves punny, funny cards! This stamp set is also by My Favorite Things and the truck was created with my Silhouette.  The patterned paper is by Studio Calico. 

So now you have seen my "man cards," and I learned that masculine cards don't have to be a mystery after all!  

Make today wonderful!  Thanks for stopping by!
Katie


Saturday, June 22, 2013

AHOY Summertime

Hi friends,

I apologize for being a little MIA this week after my craft room share on Monday.  Sometimes life just gets in the way and in this instance it was a very busy week at work that just kinda zapped all my evening energy.

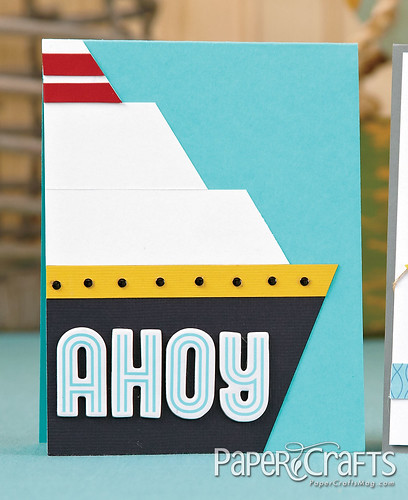
I will be back later this weekend and next week with more cards and storage ideas, but in the meantime, I thought I would share a card that was published in the July/August issue of Paper Crafts Magazine and featured on the Paper Crafts Connections blog earlier this week.


This card appears in the Nautical feature on page 37 of the print issue.  I approached this call without having any nautical-themed products in my stash, so I tried to be creative with other supplies to create a nautical look.  This card was made by trimming strips of cardstock at angles and constructing the helm of a cruise ship.  The stickers are Thinckers by American Crafts and the black dots are from Mark Richards Enterprises. 

I have another nautical card in this issue that can be found in the online issue as exclusive digital content.  This feature prompted me to play with the nautical trend for the first time and I have to admit that I am hooked.  I hope this is one trend that sticks around for a long time!

Hope you first weekend of summer, in the Northern Hemisphere anyway, is off to a great start! 

Take care and thanks for stopping by!

Katie  


Monday, June 17, 2013

Craft Room Tour

Good morning!

I hope you had a lovely weekend.  Mine was the perfect balance between play and getting stuff done around the house.  Love that!

One of the items I get to cross off my to-do list is taking some pictures of my crafty space that I am sharing with you today.  Before I get to the pictures, just a couple disclaimers....
  1. I am incredibly blessed to have this space. The house we bought 6 years ago had one extra bedroom and over time it evolved into the mom cave. It it the smallest bedroom, measuring about 10 x 11 and features a few odd nooks due to the closet configuration in the next bedroom.  The room is the hottest in the summer and the chilliest in the winter, but I am still so, so fortunate to have this dedicated room. 
  2. This space has been cultivated over time.  I have been collecting pieces and odds and ends over the past 4-5 years, upgrading storage when I could afford to do so and when I happened to come across good deals and clever ideas. 
  3. I am sharing the room in it's particularly clean state.  Just keeping it real, but you should know, it almost never looks like this. I am usually frantically working on projects or submissions so there is usually crafty vomit all over my desk...and sometimes the floor.  Oh and the closet is nicknamed "The Closet of Shame" and it has a tendency towards vomit as well, but that is for another day. 
So without further ado, let's take a look around....

Katie Gehring-Craft Room 1

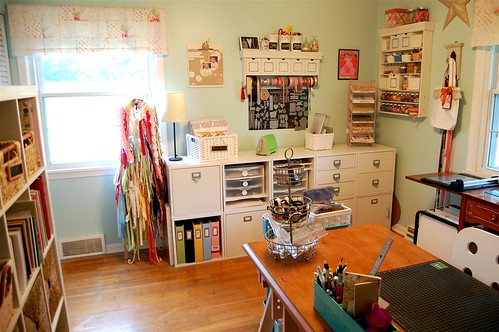
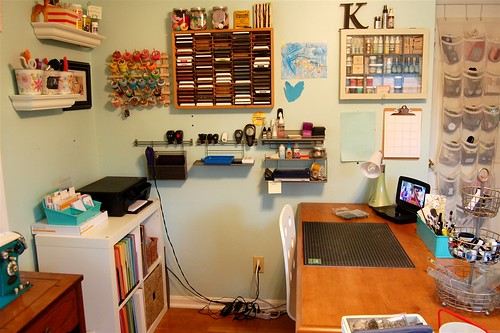
This is the view of my room from the doorway. The desk is to my right and a 4 x 4 Expedit is on my left.  On the back wall are my Cropper Hopper cubes which also serves as a work surface and die cut area. 


Katie Gehring-Craft Room 3

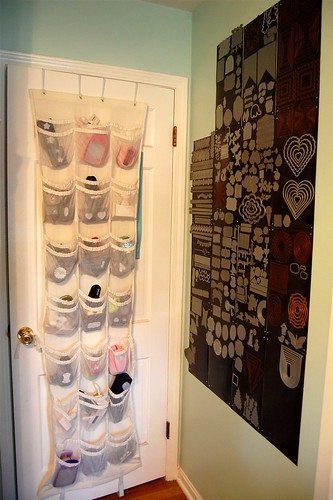
Stepping into the room and closing the door, I tried to make use of every bit of space in the room.  On the door, I hung a shoe/accessory organizer that I purchased at Bed Bath and Beyond.  The adjacent wall holds most of my wafer thin dies from various makers.  The black sheets are magnetic vent covers that I picked up at Home Depot.  As my collection of dies grows, I just purchase additional packs of covers and nail them to the wall.


Katie Gehring-Craft Room 2

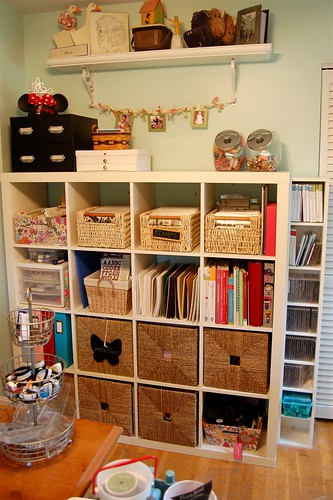
This is my Ikea Expedit.  I opted for the 4 x 4 unit and it fits this wall perfectly.  The cubbies hold tons of supplies from my 6 x 6 paper pads to my stamps, idea books, embellishments, paper and more.  The unit next to the Expedit holds stamps that are still stored in CDs or DVD cases. 


Katie Gehring-Craft Room 4


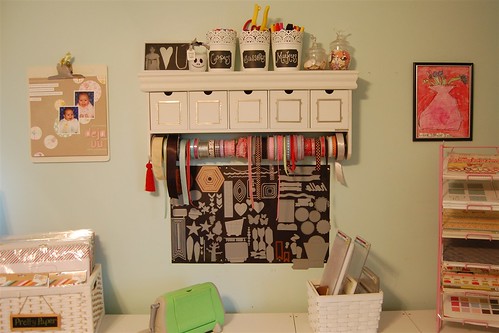
These crop in style cubes were among my first purchases from my crafty space. I bought them one at a time from JoAnn's with a coupon over a period of several months.  These drawers and cabinets hold supplies that I need to access on occassion- like glitter, cork, scrapbook album refills, etc.... I store my newest 12 x 12 scrapbook paper in the basket to the left.  8 x 8 paper pads occupy a pink paper rack on the right.  The center space is die cut central.  My Cuttlebug and it's cutting plates and folders live there and I hung some vent covers on the wall to hold my most frequently accessed dies.

Katie Gehring-Craft Room 12

The ribbon holder is by Making Memories and was one of those crazy awesome deals that I stumbled upon at Tuesday Morning.  I think the unit originally sold for somewhere around $60.00 and I found it for $5.00. 

Katie Gehring-Craft Room 5

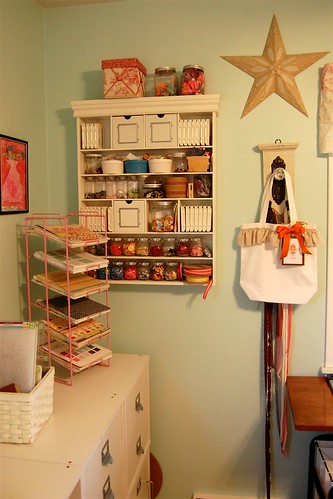
Continuing around the room, I have another Making Memories Embellishment center.  This one I picked up at Micheal's. It holds my buttons and all kinds of crafty bits and bobs.  The white rectangles in the open cubbies are my Stampin' Up ink pads.  

Katie Gehring-Craft Room 6

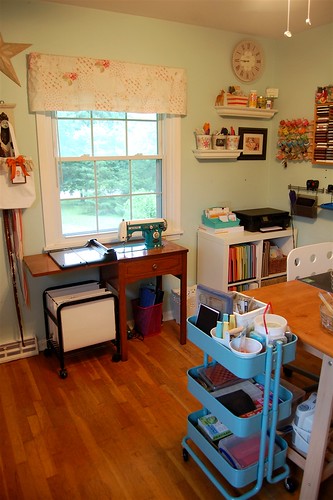
My paper trimmer and my grandparent's sewing machine are behind my workspace for easy access. 

Katie Gehring-Craft Room 11

I have another 2 x 2 Expedit unit behind my desk.  Up top, I keep my printer and a little unit that holds all my Project Life journalling cards.  The cubbies hold 8.5 x 11 and 12 x 12 cardstock, photos, and alterables. On the shelves, I keep some frequently used tools and supplies like adhesives, specialty scissors, gems and pearls, Mod Podge, etc...

Katie Gehring-Craft Room 7

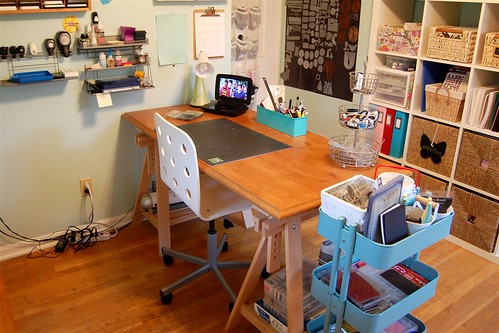
One of the recent changes I made in the room was to position the desk so that it extends out into the room.  This change gave me access to more wall space and I have super easy access to even more supplies like my ink pads and the assortment of crafty necessities on the storage rails.  Previously the desk was positioned flush up against the wall and I had to reach over the top of my desk to get to my ink or post its.  Plus it really shows off the mess of cords and the surge protector that like to hang out around my desk. 

Katie Gehring-Craft Room 9

I store most of my ink pads in a wooden cassette holder that I found on Craigslist a few years ago.  It set me back $10.00, but it was located an hour from my house. One of my newest obsessions, washi tape, has found itself a home on a spool holder purchased at JoAnn's and hung to the wall with Command Adhesive by 3M- no nails or screws- BONUS! 
Katie Gehring-Craft Room 8

So the desk top was another lucky bargain find.  I was shopping in the closeout area of Marc's (Discount store in NE Ohio) and found a stack of these table tops.  It cost $3.95.  It's heavy as all get out, but I just knew that it would make a perfect working surface.  The desk legs and cart are from Ikea.  On the wall above my desk, a simple nail holds my Silhouette Portrait Mat and a clipboard.  Artwork from my kids and family pictures are sprinkled throughout the space.

Well, that's it for the "around the room" tour of my crafty cave.  It's still a work in progress, I would love to add labels to the drawers and cabinets and do something to tame that mess of cords.  Also, my photo and memorabilia organization needs some serious help.

I have a couple more posts planned for this week to share a few more storage elements in the space, but if you have any questions or suggestions, I would love the hear them, just leave me a note!

Thank you so much for stopping by!  Make today wonderful!

Katie


Friday, June 14, 2013

Happy Holidays?

Hello and TGIF all!

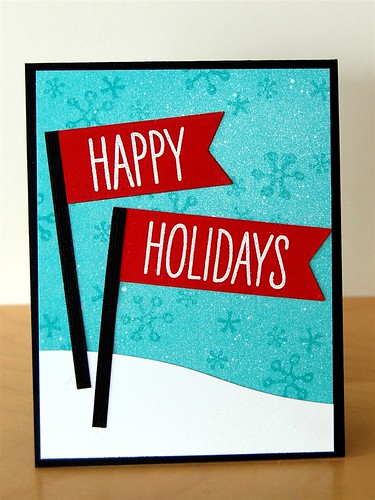
Do not adjust your monitor, yes this is a holiday card.  Yes, it's June.  I am getting a jump start on the season. LOL!

This is another card I sent in for Paper Crafts Magazine's Stamping Royalty contest.
dsc_0771

I combined a Hero Arts sentiment embossed on red cardstock with some cutie snowflakes from Neat and Tangled's Santa's Notes to create the background.  I added a little white spray ink and waited for the background to dry completely before adhering all the elements to the card.

Well, that's all for me today!  Make today wonderful!
Katie

Supplies:

Thursday, June 13, 2013

Neat and Tangled + Hero Arts= Love You

Hi-ya friends,

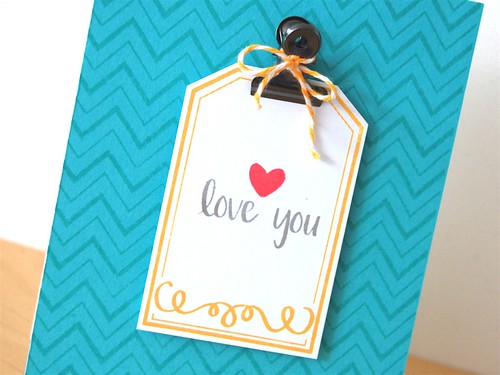
I am over at the Neat + Tangled blog today with a little card to celebrate Neat + Tangled Week at A Blog Named Hero.

dsc_0012

I would "love  you" if you could stop by and say hello! 

Make today wonderful!
Katie

Supplies:


Wednesday, June 12, 2013

Happy Birthday Balloons

Hello friends, 

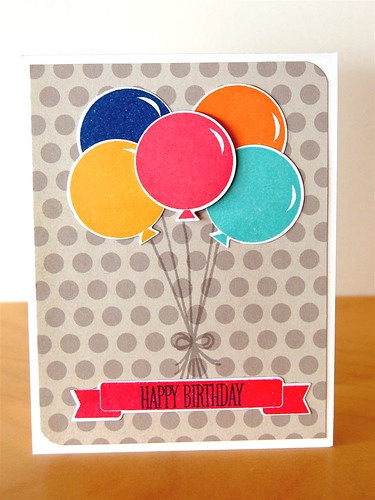
I realized just recently that I never got around to sharing the last few cards that I had submitted for Paper Crafts Magazine's Stamping Royalty contest. This card was not a winner, but I love it just the same! 

I used PTI's Birthday Wishes and Bountiful Banners plus matching dies on this card.  What I liked most about this card was the solid stamping performance of that balloon.  Sometimes, it's difficult to get a good impression with clear solid stamps.  I paired this birthday balloon with Hero Art's ink and was quite impressed with the results (no pun intended). 

dsc_0774

I stamped the balloon in Navy, Pale Tomato, Orange Soda, Tide Pool and Butter Bar,  The strings and bow were stamped with Soft Granite.  I stamped the banner in Pale Tomato and added the sentiment in navy.  For a bit of interest, I popped up one of the balloons with a bit of foam tape and rounded opposite corners. 

I will be back tomorrow to share a collaboration card with Neat and Tangled and Hero Arts stamps and on Friday, I will be sharing my last Stamping Royalty entry which also happens to be another Neat and Tangled- Hero Arts card. 

Next week, I am looking forward to taking you on a little tour of where all the magic happens.  That's right, we are going behind the curtain to take a look at my crafty space.  I am excited to share, but my inner perfectionist is a bit nervous too, so when you see it, please be kind. :o)

That's it for me!  Make today wonderful!
Katie

Supplies: 


Saturday, June 8, 2013

Congratulations

Hello friends,

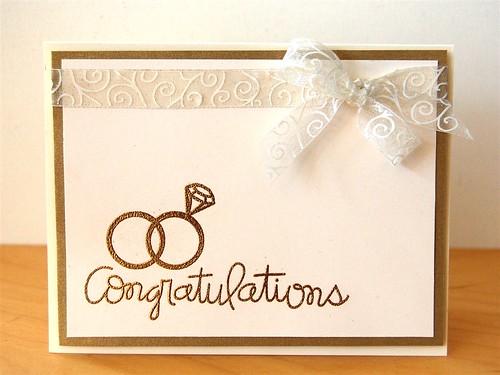
I hope you are having a good weekend.  I wanted to share a card I made for the latest Paper Smooches SPARKS Challenge.  This week's trend watch is all about gold and here's my take on the challenge:

PS- Congratulations

When I first saw the Digits set, I loved how the 8 looked like two interlocking circles or wedding bands.  To achieving this look, I embossed the 8 in gold and added the diamond from Little Lady and the sentiment from Simply Said- also embossed with gold. I matted the stamped panel onto gold shimmer paper and a little twirly, scrolly ribbon finished off the card.


You have until Sunday night, June 9, 2012 to link up your take on this week's challenge!  Thanks for stopping by!

Katie