A couple weeks ago, I shared my Neat & Tangled iPhone upgrade on the Neat & Tangled blog. Danielle was so gracious to allow me to share this little how-to on my blog as well. Enjoy!
-------------------------------------------------
So you may have heard that Apple's iPhone 5 was available for purchase last Friday. Me? Not so much. I was driving my kids to school before work and couldn't figure out why all these people were standing in line outside the AT&T store at 7 a.m.!
I guess I am not what you would consider an early technology adapter. I think I am waiting for my kids to get older so they can show me how to do all this cool stuff. I received an iPhone 4 for Christmas last year, and although I love my phone, updating models was just not part of the plan at this time (literally, I can't upgrade for another year). :o)
I strongly believe that part of the fun of phones, tablets and laptops these days is the ability to personalize and customize your technology and experience. In honor of this new technology, I decided to use some of my crafting supplies and Neat & Tangled stamps to give my old iPhone a little upgrade.
I pulled out a few of my Neat & Tangled sets: Little Tangles and Just Hello.

I also used a few other supplies:
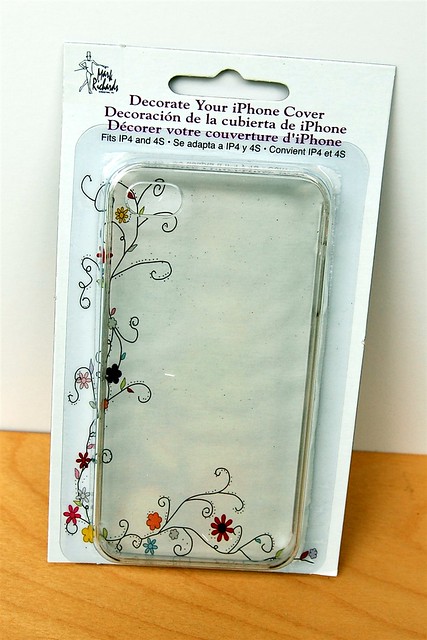
And you will also need one of these.
I found this clear iPhone cover at Michaels. It is created by Mark Richards Enterprises. It was $3.99, but you could use a coupon to bring down the cost even more. :o)
I trimmed a piece of patterned paper to 2.25" by just a touch shorter than 4.5" and rounded the corners using the 3/8" corner chomper. Using the phone cover as a guide, I traced oval where I would need to trim away the paper for the camera flash and lens. I used my old Stampin' Up slot punch to start the oval and finished it with a craft knife. This is seriously the hardest part of the whole project. :o)
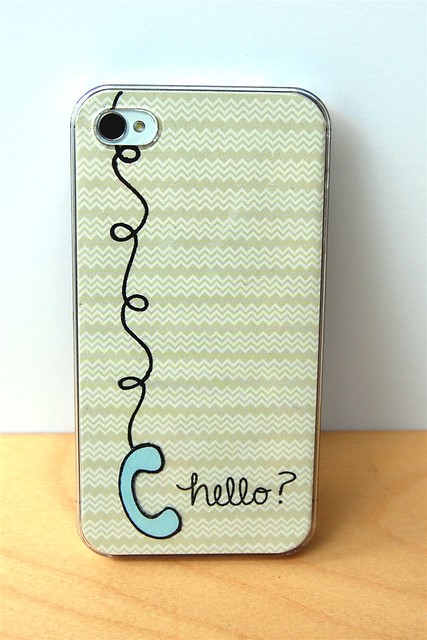
Next, I selectively inked and stamped one of the tangles from Little Tangles onto the cardstock to make a phone cord. I stamped the phone from Just Hello on a piece of aqua cardstock and trimmed out the handset and adhered to the "cord."
I also stamped the sentiment from Just Hello onto the patterned paper and then slipped it into the cover and snapped my phone in place. Now I have a low cost, but high style and totally adorable cover for my iPhone that just may help me keep loving my old phone until I can upgrade!
That's all for me today. Thank you so much for stopping by!
Katie


LOVE! It's even more cool in person! Such a fun cover my friend!
ReplyDeleteThis is so cute! I need to find one of those covers to alter!!!
ReplyDelete